Magento 2 Tensor Flow Virtual Try On: This module, the customers can try eye-wear products in a virtual environment without wearing them. The customer will upload an image and the module will automatically detect the eyes pupil.
Also, according to the selected variation, the spectacle will be visible on the uploaded face image and then the customer will be able to adjust the spectacle image over the uploaded face image.
Note: For webcam, the “Upload From Camera” feature will work on https:// connection.
Watch the below video tutorial to understand the extension workflow:
Features
- Enable or disable the module as per the choice.
- Set the “Virtual Try-On” feature for specific products.
- Upload try on spectacles for each product.
- The module supports configurable product only.
- Upload face image using either a camera or files.
- Eye pupils are detected automatically in the image.
- Adjust the spectacle image on the face image if not on the appropriate position.
- Virtually try the spectacles on the face image as per the selected variation.
- Download the generated image with a spectacle.
Installation
Customers will get a zip folder and they have to extract the contents of this zip folder on their system. The extracted folder has an src folder, inside the src folder you have the app folder. You need to transfer this app folder into the Magento2 root directory on the server as shown below.

After the successful installation, you have to run these commands in the Magento2 root directory.
First command – php bin/magento setup:upgrade

Second command – php bin/magento setup:di:compile

Third Command – php bin/magento setup:static-content:deploy

After running the commands, you have to flush the cache from the Magento admin panel by navigating through->System->Cache management as shown below.

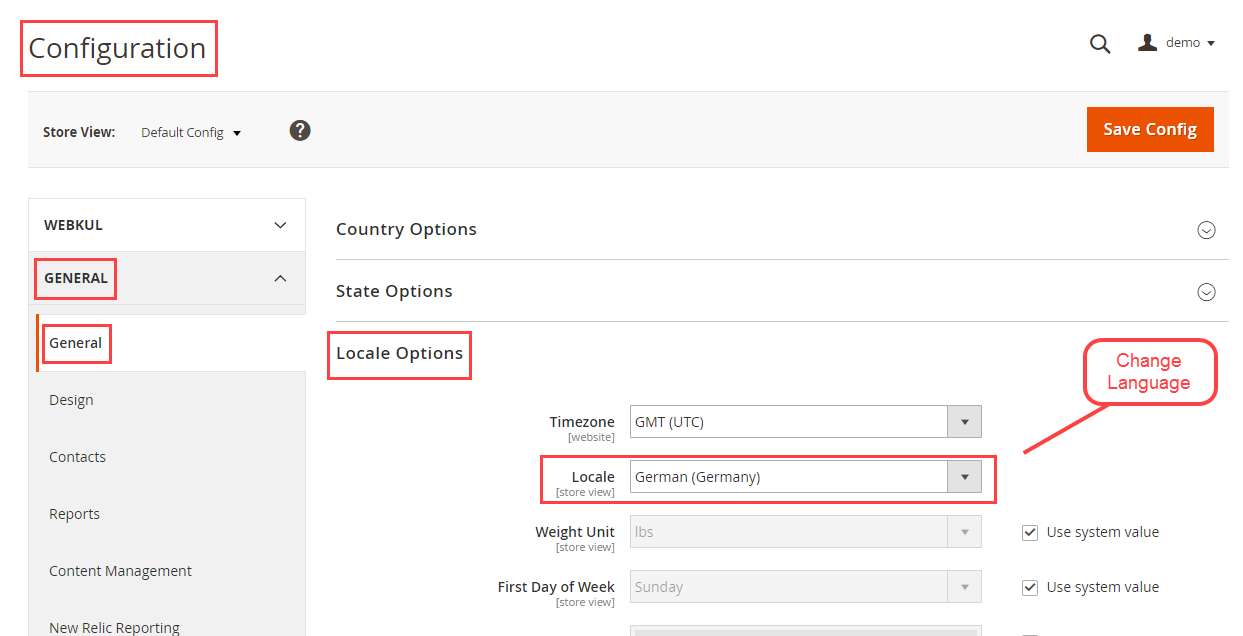
Multi-Lingual Configuration
For Multilingual support, please navigate to Store>Configuration>General >Locale Options. And select your desired language from the Locale option.
Language Translation
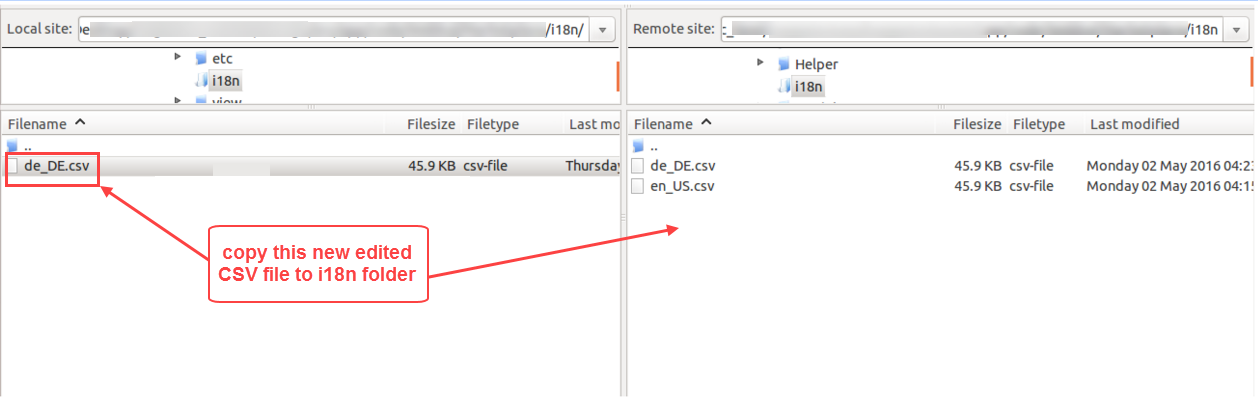
For module translation, navigate through the following path in your system app/code/Webkul/VirtualTryOn/i18n/en_US.csv. Open the file named en_US.CSV for editing as shown in the below screenshot.

Then replace the words after the comma(,) on the right in the file with your translated words.

After editing and translating the CSV file, you need to save the translated file name according to your region language and country code such as – de_DE.CSV. Followed by uploading the translated file to the same folder from where you have obtained it. Now your module translation is complete.
Module Configuration – Tensor Flow Virtual Try On
After the module installation, the admin will configure the module settings. For this, the admin will navigate to Stores -> Configuration -> Webkul -> Virtual Try-On as shown below.

Here, the admin will –
- Enable Virtual Tryon On Frontend – Enable or disable the module as per the choice.
- Thumbnail – Upload the default thumbnail image for background in the virtual try-on pop-up for the products.
- Enter Block Identifier – Select the block to display the instructions for the customers on the frontend.
- Enter Simple Upload Button Text – Configure the text on “Upload” button.
- Enter Camera Upload Button Text – Configure the text on “Camera Upload” button.
- Enter New Upload Button Text – Configure the text on “New Upload” button.
- Adjust Button Text – Configure the text on the “Adjust” button.
- Delete Button Text – Configure the text on “Delete” button.
- Download Button Text – Configure the text on the “Download” button.
- Face Detection Process Step 1 – Define the description of step 1 of virtual try on process which will be visible at the frontend.
- Face Detection Process Step 2 – Define the description of step 2 of virtual try on process which will be visible at the frontend.
- Face Detection Process Step 3 – Define the description of step 3 of virtual try on process which will be visible at the frontend.
- Face Detection Process Step 4 – Define the description of step 4 of virtual try on process which will be visible at the frontend.
Add Virtual Try-On – Products
Now, the admin will enable the “Virtual Try-On” feature for the products. For this, the admin will navigate to Catalog -> Products as shown below.
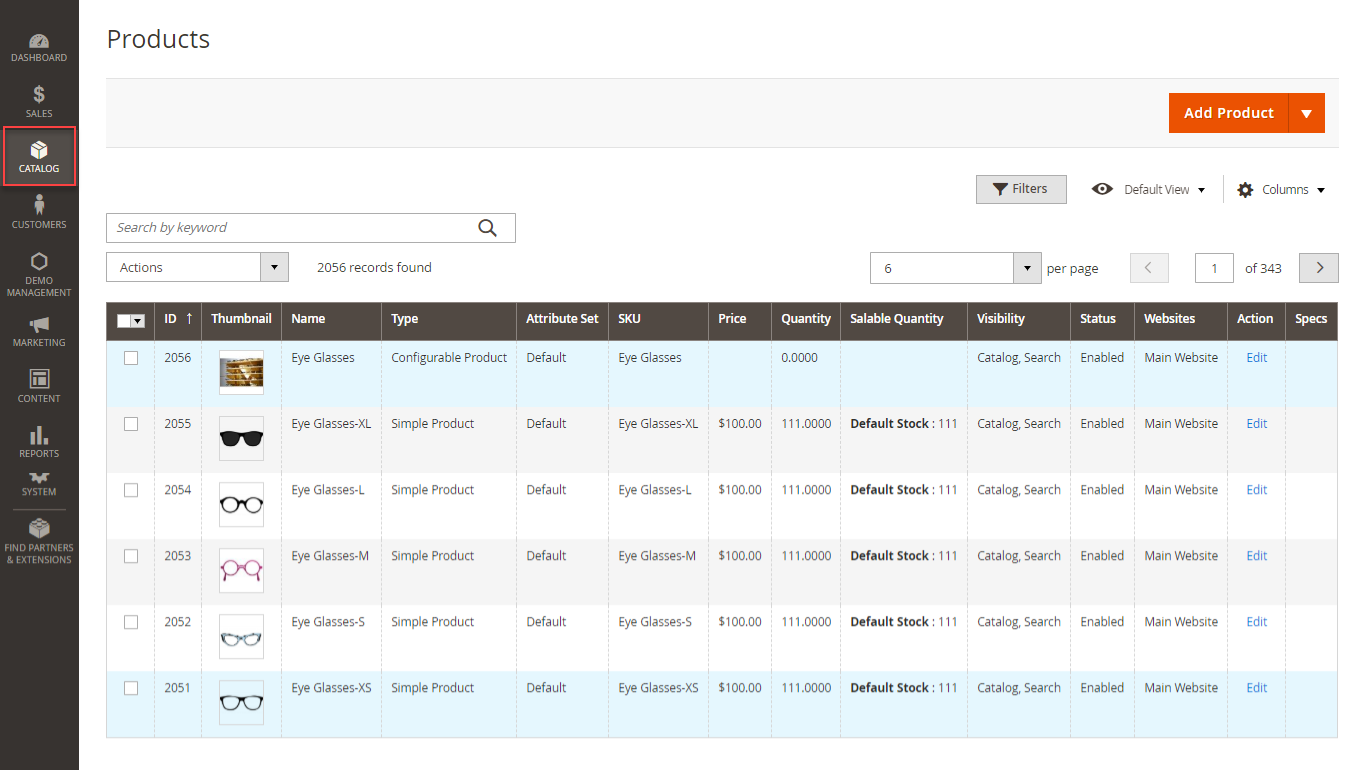
From here, the admin can create the new product with “Virtual Try-On” feature. The admin can even edit the existing products to enable the “Virtual Try-On” feature. For this, click the Edit button of the product for which the admin wants to enable the “Virtual Try-On” feature. This will navigate the admin to the product edit page as shown below.
Note: The module supports configurable products only.

Here, the admin will –
- Is Try On Product – Enable this field if want to add the “Virtual Try-On” feature for the product. Else disable this field if don’t want to add the “Virtual Try-On” feature for the product.
- Configurations – Under this section, the admin will configure the “Virtual Try-On” feature for associated/child products. For this, the admin clicks the associated/child product for which the admin wants to enable the “Virtual Try-On” feature. This will navigate the admin to the “Product Edit Page” of that associated/child product.

Here, the admin will click on the product image which will display a pop-up.
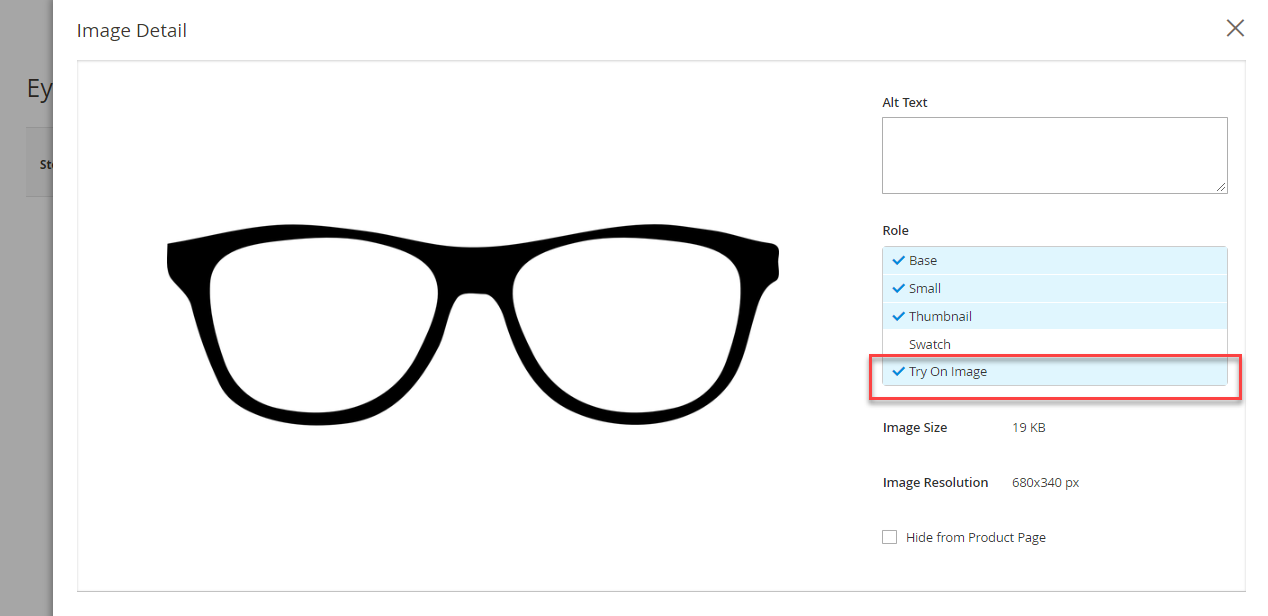
Under Role section, select the Try On Image option and save the configurations. Similarly, the admin will enable the “Virtual Try-On” feature for other associated/child products.
Front-End
At the frontend, the customers can view the products with the virtual try-on feature.

Here, the customer first selects the variation of the configurable product and then click the blank image.

Clicking the Upload New Image button will display a pop-up screen as shown below.
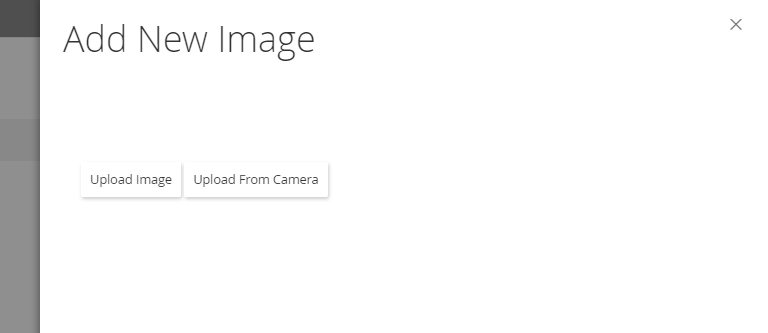
The customer can either upload the image using the device camera or upload it from files. Once the image gets uploaded the customer will get navigated to the new page.

Here, the customer will crop the image by clicking the Crop Image button. And then, the virtual try-on process gets started. After the virtual try-on process is done, the specs get visible on the eyes as per the selected variation.
Magento 2 Tensor Flow Virtual Try On
The customer can get back to the product page clicking the Done button.

Here, the customer can perform other actions –
- Upload New Image – Upload the new image for virtual try-on.
- Adjust Position – Adjust the position of the specs on the face image.
- Delete Current Image – Delete the current image used for virtual try-on.
- Download – Download the image with virtually tried specs.
The customer can select other variations for virtual try-on.

And as per the selected variation, the specs will be visible on the face image.

Conclusion: Using the Magento 2 Virtual Try On Tensor Flow now enjoy trying out the products virtually to get satisfied before purchasing a product.
Support:
If you have any queries or doubts get back to us at [email protected] or raise a ticket at our HelpDesk System.
Current Product Version - 4.0.2
Supported Framework Version - Magento 2.0.x, 2.1.x, 2.2.x,2.3.x, 2.4.x

Be the first to comment.