BigCommerce Salesforce Connector: BigCommerce and Salesforce Integration is taking e-Commerce & CRM platform to new heights. Now dealing with e-Commerce unlimited data is much easier than ever before.
It is acting as a bridge between BigCommerce and Salesforce and enhancing features of e-commerce and CRM platform with the concept of service first approach.
With the help of this application, admin can easily synchronize Customers, Categories, Products, and orders to Salesforce CRM which will help them to track sales and growth trends.
The connector has the facility of real time synchronization for Customer, Category, Product and Order.
Note : Application required to install in Salesforce Org : eShopSync For BigCommerce
BigCommerce Salesforce Connector Overview
BigCommerce Salesforce Connector Features
- Provides unified Salesforce platform to manage both e-Commerce and CRM data.
- Synchronize e-Commerce data at Salesforce end to avail CRM benefits.
- Avail hassle free environment.
- Synchronization of Categories.
- Orders and Products synchronization for inventory management.
- Customers synchronization as Accounts and Contacts at Salesforce end.
- Guest Checkout synchronization with complete User & Orders details.
- Interactive design with user interface at Salesforce end
- Provides Real-time Synchronization of Categories, Product, Customer and Order.
How to Configure our BigCommerce Salesforce Connector?
Pre-Configuration settings
First you need to install “eShopSync For BigCommerce” from AppExchange. For this, you need to Go to Setup | Customize | Accounts | Fields | Check Custom fields created by eShopSync for BigCommerce
- Firstly, Click on Bigcomm Email ID.

2. Then, secondly, Click on View Field Accessibility.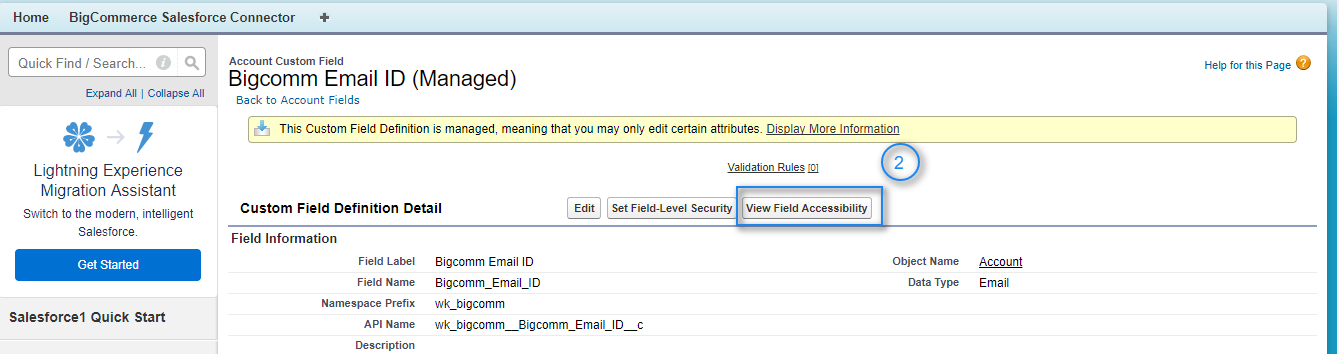


- Follow the same steps to update field accessibility for all custom fields created by eShopSync forBigCommerce on Accounts, Contacts, Orders, Order Products, and Products.
5. Afterwards, you need to Create a site
Steps:
- For this, firstly, you need to Go to the quick find box and type site, after that click on site.

- Secondly, you need to Click on New.

- Thirdly, you need to Add details and click on Save.

Configuration @ BigCommerce End
1. Firstly, you need to Login to BigCommerce Admin panel. Then, you need to Go to Advanced Settings.


5. Fifthly, you need to Choose Read Only option as shown below.
6. Sixthly, now you have to Click on Save.
7. Afterwards, you need to Make a note of all mentioned API credentials on the screen.


Configuration @ Salesforce End
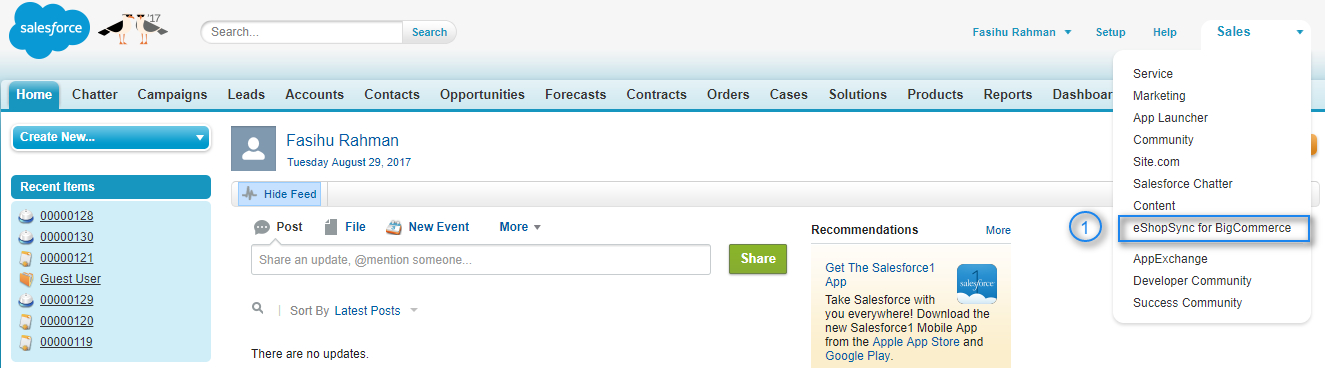
1. First, you need to Login to Salesforce and go to eShopSync For BigCommerce from the drop-down.
2. Second, you need to Click on BigCommerce Salesforce Connector tab.

3. Thirdly, In Configuration section, you need to enter the API Credentials downloaded in the doc file as shown below.
4. Forthly, you can Choose the appropriate Price Book to list synced product with the corresponding pricing.
5. Afterwards, you need to Select an appropriate site


6. Then, you need to Click Save to establish the connection.
Lightning Configuration
- First, you need to Go to App Menu| Click on eshopsync for Bigcommerce
- Second, you need to Click here for set up & Configuration
- Thirdly, you need to Fill the required details
- Going forward, forthly, In the Object settings, there is an option of Variant as a product by enabling its feature. All the variants under the Products in Bigcommerce would synchronize as a specific product at the Salesforce end.


6. Now, in this step, you can easily Mapp the standard fields of Bigcommerce to the Salesforce end with the compatible data type.
Synchronization Process
- Categories Synchronization: Click Categories
1. Firstly, Click Import to start sync process.
2. Secondly, Click Refresh to display the synced Categories on the current page.
3. Thirdly, To search any Category by Category Name.
4. Forthly, Filter Categories for Salesforce/ BigCommerce/ All Categories.
5. Afterwards, Extend the number of Categories visible per page.
6. Moving forward To add new Category manually.
7. Proceed To Delete multiple selected Categories.


- Products Synchronization: Click Products
1. First, you need to Click on Import to start sync process.
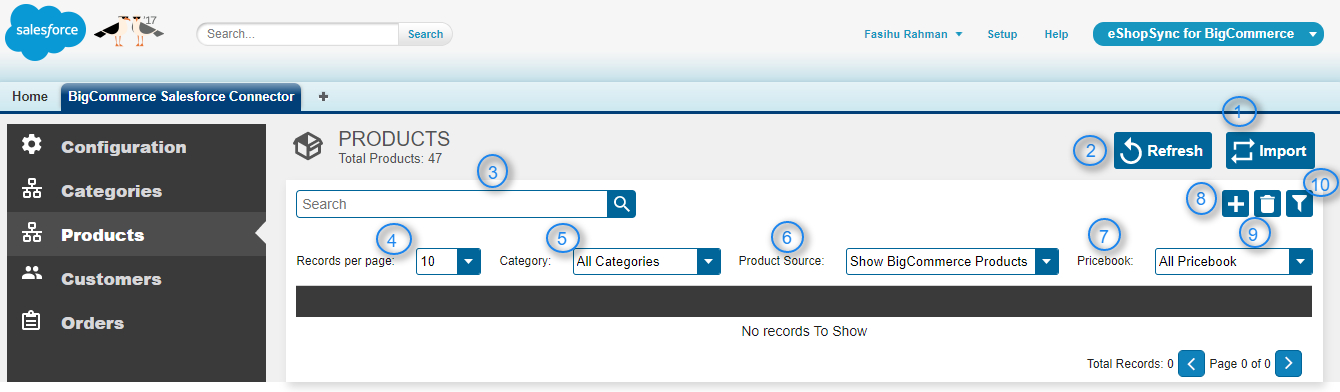
2. Secondly, you need to Click Refresh to display the synced Products on the current page.

3. Third, you need To search any product by Product Name.
4. Fourth, you need to Extend the number of products visible per page.
5. Moving ahead, Filter Products on the basis of specific Categories.
6. Proceed with Filter Products for Salesforce/ BigCommerce/ All Products.
7. Now you must Filter Products based upon available Price Books.
8. Forthly moving aheas, To add Products manually.
9. Proceed To Delete multiple selected products.
10. Now you must Move ahead to Expand Filter options.
- Customers Synchronization: Click Customers
1. First, you need to Click Import to start sync process.
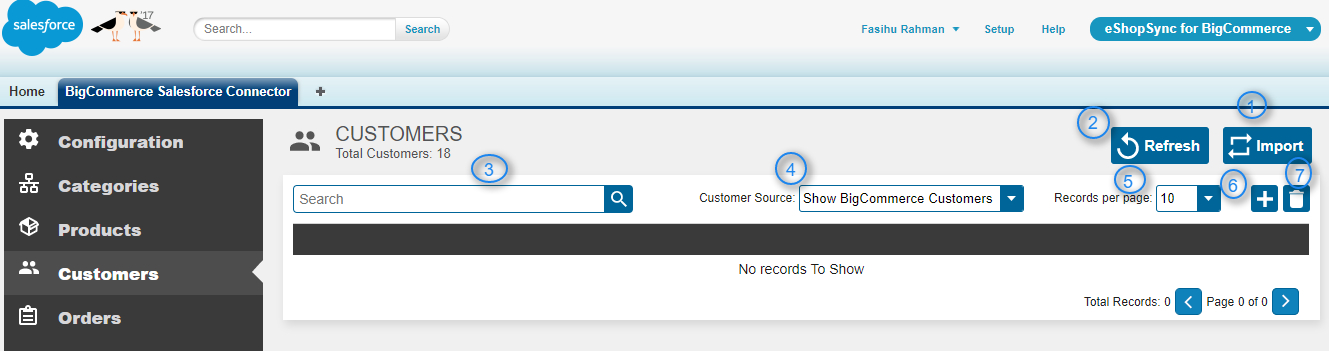
2. Secondly, you need to Click Refresh to display the synced Customers on the current page.
3. Thirdly, To search any customer by Customer Name.
4. Forthly, Filter Customers for Salesforce/ BigCommerce/ All Customers.
5. Fifthly, now, you can proceed with Extend the number of Customers visible per page.
6. Sixthly, going forward To add Customers manually.
7. Proceed ahead To Delete multiple selected Customers.

-
Order Synchronization: Click Orders
1. Firstly, you need to Click on Import to start the sync process.

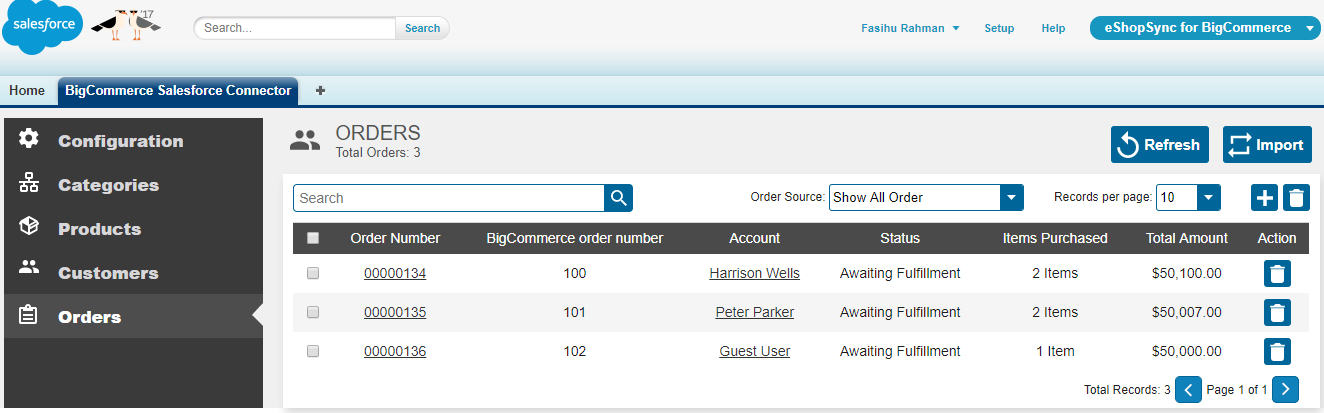
3. Thirdly, you need To search for any Order by Order Number.
4. Forthly, Filter Orders for Salesforce/ BigCommerce/ All Orders.
5. Fifthly, you must Extend the number of Orders visible per page.
6. Sixthly, Begin To add Orders manually.
7. Now you can proceed to Delete multiple selected Orders.
Support
- For any further query, Click To Create Ticket
- To know feasibility of specific requirement: Request For Customization
- To view all our applications in Appexchange, go to Webkul AppExchange Apps.
Current Product Version - 1.3.0

Be the first to comment.